Tuesday, January 14, 2014
Near-Perfect Hardboiled Eggs
About a year ago, a very good friend of mine posted pictures on Facebook of her attempts at making hardboiled eggs. As I stared at the three nearly mangled specimens, I felt her pain. I had always, ALWAYS had trouble hard boiling eggs and would end up with very similar results. Short of buying an egg cooker (which does work), which is a unitasker and thus, not allowed in my kitchen, I had to come up with a way to hard boil eggs in such a way as you could make deviled eggs and they'd all look beautiful.
We eat A LOT of hardboiled eggs in this household. So I tend to boil a dozen at a time. And important thing about boiling eggs, is DO NOT WALK AWAY. I usually try to do small kitchen chores so that I'm in the same room, but not waiting for the (proverbial) pot to boil.
Where did I go to do my research? Well, the internet of course!!!! I tried several "proven" methods and have come up with the following method that has worked beautifully nearly every time I do them. It has taken me a year to perfect this method, and continue testing, timing, etc.
FIRST - and most important - start with "old" eggs. Well, not "old" as in out of date, but "old" as in not seriously fresh. The older the egg, the more detached the white is from the shell, thus making the end result much easier to peel. I actually buy an extra dozen each week to intentionally "age" them. I stick them in the back of my fridge and don't pull them out until the next step.
NEXT - use room temperature eggs. The warmer the egg is when you start the process, the more separated the white is from the shell (again, this will make the peeling easier). I do this by midday - the day before I plan on boiling them - place them upside-down in the carton on the counter. Placing them upside down re-centers the yolk so that it will be more in the "middle" of the egg - this is important when you're going to use them in deviled eggs. I also leave them there until the next day (or about 24 hours later)….I move onto the next step.
AND THEN - place eggs in a pan large enough that you can cover them with 1" of water AND that they can move around while boiling. I use my 5 quart soup pot for a dozen eggs. Cover them with COLD water. Place on medium heat and bring to a rapid boil, then:
NOW DO THIS - turn OFF the heat, cover with a tight fitting lid and set a timer for 10 minutes.
NEXT - after 10 minutes, remove lid and drain hot water. Cover with VERY COLD water. Drain again. While drained, place the lid back on and shake the pan around - I swirl in circles, do quick up and down moves, etc. This breaks up the shells, and makes them easier to peel.
AND THEN - cover with VERY COLD WATER again. Gently lift one egg at a time out of the pot of cold water and close to the water's surface, gently peel the egg. And voila…beautiful hard boiled eggs, almost EVERY SINGLE TIME (that why I say "near-perfect" and not perfect, sometimes there's just one bad egg!)
So, Weave, hope this helps you!!!! :)
Tuesday, December 31, 2013
Sticky Bun Ring
How many of you love Pinterest? I got addicted to it this year. Pinning like mad. And trying things. Sometimes it works, sometimes it doesn't. Well, this was a pin I came across and had hoped to make on Christmas Morning….however, I could not find it for the life of me! And I had forgotten to pin it! OH MY! So, after learning that some good friends were coming to visit for an overnight, I made the plan to Aldify this recipe…which meant I had to find it again. I FOUND IT!!!!
Since it is NOT my recipe and I only used Aldi ingredients, I'm not going to share the recipe - instead, I'll share the link to the originator. Please visit her site and try this! It's soooooo yummy. The picture is mine. I had to adapt a little b/c I don't have a bundt pan, I only have a monkey bread pan. As you can see it turned out quite well, and it was all gone in a matter of minutes, so I believe it was popular.
Please do stay tuned, though. I do have some of my own adjustments to it that I intend to test and try and will put an adjusted recipe on soon.
In the meantime, enjoy the original!
Sticky Bun Ring
Thursday, December 12, 2013
Christmas Cut-outs - Busy Mom Version
I'm gonna get a lot of flack for this recipe. It starts with a cake mix (go ahead Kristy, gimme your best eye rolls and groans!). It also happens to be derivative of a recipes I've shared before, the Cake Mix Cookies. It's been updated and enhanced a little bit for use as cutouts.
Yesterday, it snowed. A lot. And even though we're homeschoolers, and had schoolwork to do, all of our out-of-the-house activities got cancelled. My oldest and I spent part of our day preparing doughs for Christmas Cookies. A double batch of Ultimate Snickerdoodles, PB Kiss and Oatmeal Scotchies. While the kids played in the snow and built a snowman, I watched from the kitchen window while preparing this dough on my own. While hubby took my youngest to gymnastics, I rolled out the dough and baked them.
Today, we had a light agenda, so we decorated the cookies. It was lots of fun. Made memories.
Christmas Cut-Outs
1 Box Baker's Corner Yellow Cake Mix
1 stick Country Creamer Butter, softened
2 Golden Hen Eggs
1 tsp Stonemill Essentials Pure Vanilla Extract
In a mixer, mix together butter, cake mix, eggs and vanilla extract until smooth.
Place in a baggie and refrigerate for at least 2 hours.
Preheat oven to 350.
Roll out dough on a well-floured surface. Use floured cookie cutters and cut out. Place on a greased cookie sheet about 1 1/2 apart.
Bake for 12-15 minutes until edges are JUST starting to get golden.
Remove from oven and allow cooling on cookie sheet for about 5 minutes before trying to remove them. Once cooled, decorate with Baker's Corner Vanilla frosting and Christmassy sprinkles!
Monday, December 9, 2013
Christmas baking must commence….
Now that I've grabbed your attention!
A few years ago, I did the 12 Recipes of Christmas, counting down to Christmas day. It included some yummy cookies and such.
I thought of all of you as I am starting to make my cookie doughs!
Would love to hear what you like to bake this time of year! Please comment! If you have a link to the recipe, by all means, SHARE SHARE SHARE!!! :)
Saturday, November 23, 2013
Ravioli Lasagna
Well, I gave in. I made Ravioli Lasagna tonight for dinner. Four ingredients. A little bit of time, and a lot of reward for this easy meal.
1 lb Ground Meat (I used Fit & Active Ground Turkey)
1 jar Reggiano Traditional Spaghetti Sauce
1 bag Priano Cheese Ravioli
1 bag Happy Valley Farms Shredded Mozzarella Cheese
Preheat oven to 350.
Brown ground meat in a pan, add half the jar of sauce. Stir until just combined, it will cook more in the oven.
Pour just enough sauce to cover bottom of a 8X8 baking dish.
Layer 16 raviolis, lined up in a square (overlap if you have to) over the sauce. Top with half of the meat mixture. Sprinkle with Mozzarella cheese. Layer on 16 more raviolis. Top with the remaining meat mixture. Sprinkle with Mozzarella cheese. Layer on 16 more raviolis. Top with the remaining sauce from the jar. Sprinkle with more Mozzarella cheese. You might have a couple raviolis and a some shredded cheese left.
Bake for about 30-40 minutes in the oven - until all warm and bubbly.
Let set for about 10 minutes before serving.
Enjoy.
You're welcome.
Friday, November 15, 2013
Breakfast Cookies
Okay, I'm sure you read this title and have immediately called into question my parenting abilities. Sure, Breakfast For Dinner, we can grasp that, support that, emulate that. But DESSERT for BREAKFAST? I must have a screw loose somewhere, right? Nope. I don't.
How many of you have sat and read the labels on your breakfast cereals lately? Poptarts? Waffles? (you put syrup on them right?)….okay, so cookies for breakfast is not that much of a stretch, and THESE cookies? Well, they're downright HEALTHY.
I'm always in search of a good grab-and-go breakfast. Recently, a friend of mine posted on Facebook - or was it Pinterest? - I digress, she posted this recipe for Homemade Breakfast Cookies that she found somewhere. I had to Aldify it, of course. For your viewing (and dining) pleasure, I give you:
BREAKFAST COOKIES!
2 1/4 Cups Millville Whole Rolled Oats (you can use the instant, also, I prefer these)
3/4 tsp Sebree Salt
1 tsp Stonemill Classics Ground Cinnamon
1 Cup Creamy Delight Peanut Butter (you CAN use crunchy, if you prefer, or the natural version)
1/4 Cup Golden Honey
2 Ripe Bananas, mashed
1/2 Cup Sunflower Seeds (hulled and roasted, the only non-Aldi ingredient…my Aldi DOES sometimes carry these - check yours for sure, sometimes they're upfront by the checkouts)
1/2 Cup Baker's Corner Semi-sweet Chocolate Chips
(or you could do 1/4 cup raisins, 1/4 cup chocolate chips - my kids don't like raisins in cookies, and oatmeal raisin cookies are the reason I have trust issues, so I used all chocolate chips in mine)
Mix all the ingredients together and drop by spoonfuls onto a greased cookie sheet. Flatten the tops of each (these cookies will not spread as they bake like a normal batter would).
Bake at 325 degrees for 15-20 minutes (will depend on YOUR oven, mine took closer to 20) until slightly browned. Cool completely before storing in an airtight container.
NOTE: I used my normal cookie scoop and it made about 2 1/2 dozen cookies, the recipe I worked from had it only making 12 cookies, so they were MUCH bigger. I would say 2 cookies with a half cup of milk would be a serving. :) The original recipe also called for processing the oats a little bit - especially if you were using whole oats - I opted not to do that because I love the texture of the full oat. If you are put off by that texture, process HALF of the oats OR use the quick oats instead.
Friday, November 8, 2013
Chicken Italiano Meatloaf (Crockpot)
I'm so thankful that it is fall, and that cold weather is setting in. I have been using my crock pot A LOT the last couple weeks. My preferred method for cooking in the fall and winter. Warm, cozy comfort food. Little effort. Maximum payback. It helps, too, on those crazy nights when each of the 3 kids go in different directions!
Yesterday morning, I woke up with a hankering for meatloaf. But knowing that I was not going to be home over the dinner preparation hours, it had to be a crockpot night. Now, I know you all will find this surprising, but I have NEVER made a meatloaf in a crock pot before. Well, I have now, and quite frankly, I might not go back!
Chicken Italiano Meatloaf
2 Lbs Fit & Active Lean Ground Chicken (sometimes my store carries Tyson, but not always)
1 Tbs Stonemill Classics Minced Onion
1 Tsp Stonemill Classics Minced Garlic
1/2 Tsp Stonemill Classics Season Salt
1 Tsp Stonemill Classics Italian Seasoning
1 Golden Hen Egg
1/2 Cup Millville Rolled Oats
1 Can Happy Harvest Whole Tomatoes
1 Large Onion, sliced
1 Large Green Pepper, Sliced
1 Box Couscous (I know the brands vary by store)* OPTIONAL
In a large bowl, mix together ground chicken, minced onion, minced garlic, seasoning salt, italian seasoning, egg and rolled oats. Mix well, set aside.
In a large crockpot, place half of the tomatoes, squeezing/crushing as you put them in. Top with sliced onion, then sliced green peppers.
Form meat mixture into a "loaf" and place over the sliced vegetables. Top with remaining tomatoes, crushing in your hands as you add them, pour sauce leftover from tomatoes in can over the top of the meatloaf.
Cook on high for 1 hour. Turn to low and cook for 6-8 hours.
After finished cooking, remove cooking liquid and use to make the couscous (this is optional, if you decide not to use the couscous, strain excess liquid and just serve with the cooked onions, peppers & tomatoes overtop.
Monday, November 4, 2013
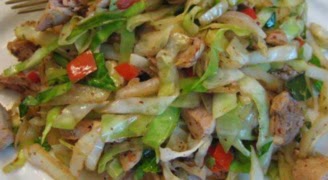
Cabbage & Chicken Stir Fry
Hubby is cheerfully back on Medifast. Which means that I need to get creative to make "safe" Lean & Green meals for him. A few days ago on FaceBook, a very good (and very healthy, and very thing, and very active) friend of mine posted this recipe. I adapted it a little bit for Aldi, but it was so delicious. We loved it. Even my kids ate every single bite! There were NO leftovers, I believe I will double the recipe next time.
Cabbage & Chicken Stir Fry
3 Boneless/Skinless Chicken Breast Halves
1 Tbs Carlini Canola Oil
3 Cups Green Cabbage, shredded
1 Red Pepper, julienned
1 Tbs Baker's Corner Cornstarch
1⁄2 tsp Spice Classics Ginger powder
1⁄4 tsp Spice Classics Garlic powder
1⁄2 cup water
1 Tbs Asia Specialties Soy Sauce
2 Scallions, thinly sliced * (my Aldi does not sell these, but I know some do)
Cut chicken breasts into strips. Heat oil in a frying pan, add chicken strips and stir fry over medium-high heat,
turning constantly until done. Add shredded cabbage and red pepper strips, sauté 2 minutes until cabbage is
crisp-tender. In a small bowl, mix cornstarch and seasonings; add water and soy sauce, and
mix until smooth. Stir sauce into chicken/cabbage mixture. Cook until sauce has thickened and chicken is coated, about 1
minute.
I served with Season's Best Steamed Broccoli. You could also add shredded carrot, if you like. (I did not because carrots are not an authorized vegetable on my husband's diet plan.
Friday, July 12, 2013
Italian Goulash
I promised you! And I always deliver on a promise! :)
Today was an unbelievably rainy day. No matter how much I wanted to go, we could NOT go to the pool. Instead, I spent the day inside, assisting my MIL while she unpacked boxes, doing laundry that's been piling up (affectionally called Mount Washmore)....and taking a nap. Yes. Yes I did take a nap. It was raining. Isn't that what you're SUPPOSED to do when it rains? It was only about a half hour nap, so don't get TOO jealous!
Well, when I got up from my nap, I knew that everyone would want to eat. They always do. Well, I made a variation of a recipe I call Tuscan Chicken (which I'll share later when I make it again). I didn't want to use chicken due to the fact that my MIL and I are sincerely tired of chicken! So I tried it with the Lean Ground Beef. Yummy!!!!
This can be served over Fit & Active Brown Rice, or....like I did...over Cheese Club Macaroni & Cheese. :)
Italian Goulash
1 lb. Fit & Active 93% Lean Ground Beef
1 large zucchini, large dice (I do 1/2" cubes)
1 medium onion, small dice
1 carrot, julienned
1 clove garlic, minced
1 Can Happy Harvest Dice Tomatoes, drained
1 Can Happy Harvest Crushed Tomatoes
1 Can Dakota Great Northern Beans, drained and rinsed
Brown ground beef in a large skillet. Add zucchini, onion, carrot, garlic. Add diced tomatoes. Cook until the vegetables are crisp tender. Add crushed tomatoes and beans. Simmer on low for about 20 minutes.
Serve. And enjoy! :)
Thursday, July 11, 2013
Haven't been cooking too much lately...
But I will start again soon, I promise.
I know I mentioned that my MIL moved in with us back in the end of March. I've had little time to be creative lately. But as things start to slow down and get more settled, I will be back at it soon. I've been dabbling with Aldifying a few new recipes.
I'll be posting soon! :)
Meanwhile, check out your local Aldi for some amazing summer deals! Mine has had some very fun flavors of ice cream, and some of our favorite summer snacks (love Clancy's Cheese Puffed Popcorn). Prices on berries have dropped as well! Our local Aldi has had gorgeous strawberries for .99/pint! UNREAL!
See you soon, folks! Thanks for hanging in there with me!
I know I mentioned that my MIL moved in with us back in the end of March. I've had little time to be creative lately. But as things start to slow down and get more settled, I will be back at it soon. I've been dabbling with Aldifying a few new recipes.
I'll be posting soon! :)
Meanwhile, check out your local Aldi for some amazing summer deals! Mine has had some very fun flavors of ice cream, and some of our favorite summer snacks (love Clancy's Cheese Puffed Popcorn). Prices on berries have dropped as well! Our local Aldi has had gorgeous strawberries for .99/pint! UNREAL!
See you soon, folks! Thanks for hanging in there with me!
Sunday, April 14, 2013
Protein-packed Pudding
Well, to help boost it's nutritional factor, I make it with half milk and half greek yogurt (My Aldi sells Fagé, but your Aldi might sell something else. You can also use the Fit & Active Plain Yogurt instead of greek yogurt. The texture's not as thick, but it does boost the protein and nutritional values!
Recently, my mother-in-law moved in with us. Her favorite treat has been her nightly pudding. She asks every evening with a gleam in her eye "do you have any chocolate pudding tonight?". :) She looks like a little kid asking for ice cream. She's been known to lick the little jars. She told me last night that I really must share my recipe on my blog. So I am! This one's for you, Mom!
Protein-Packed Pudding
1 Package Baker's Corner Sugar Free Pudding (your favorite Flavor)
1 Cup Friendly Farms 2% Milk (or whatever milk you get from Aldi)
1 Cup Greek Yogurt (whichever brand your Aldi sells, OR Fit & Active Plain Yogurt)
In a large bowl, thoroughly mix together milk and yogurt until very smooth. Add in pudding mix and continue to mix well. Divide into 4 4 oz containers OR 1 large container to serve from. (We do individual servings to make it an easy grab-and-go snack).
Thursday, March 28, 2013
Matt's Mug Brownie
Please don't judge a recipe by it's photo!
I have a very dear friend, who has this amazing 19 year-old son, Matt. Matt is quite the baker. I envy his talent. I really, really do. He takes simple ingredients and makes them astounding! He's not afraid of any recipe. He's an avid bread baker, cookies, cakes, brownies, muffins, you name it....he makes it. For Christmas Dinner he brought this cheesecake that was at LEAST 1000 calories a slice...and it was oh. so. yummy.
Well, my friend recently posted that they're addicted to his new brownie recipe. And they can make it in a mug. In the microwave. A quick and dirty little recipe for when that chocolate craving strikes. Of course, I made the sacrifice and tried it out for all of you so that I could share it with you. It was a hardship, I will tell you. I even burnt the roof of my mouth b/c I could not wait for it to cool down to eat it! And I had to try it over and over and over again. Not because there was anything wrong with the recipe, mind you, but because it was so yummy, I had to make sure I wasn't dreaming!
Matt's Mug Brownie (serves ONE)
1/4 Cup Grandma's Best Flour
1/4 Cup Grandma's Best Granulate Sugar
2 Tbs. Baker's Corner Cocoa Powder
Pinch Sebree Salt
2 Tbs. Oil (matt's recipe recommends olive oil, I used Carlini Vegetable oil)
3 Tbs. Water
Mix dry ingredients into a mug. Add oil and water and mix with a fork. Cook on high for 1 minutes and 40 seconds in the microwave. Don't burn your tongue!
Thursday, March 21, 2013
Spring Sensations Chocolate Chip Cookie Cake
In keeping with the pizza theme, we made a pizza cookie to celebrate my youngest daughter's birthday (again, yeah, this kid's had like 4 parties so far!). My oldest wanted to play with the sugar dipped marshmallows like we used for the cupcakes, but she wanted to make them into butterflies. I think it turned out really cute.
All we did was follow the recipe on the back of the package of the Baker's Corner Semi-sweet Chocolate Chips. EXCEPT FOR ONE THING....the recipe calls for 1 cup butter (which would be two sticks). I do 1 stick butter, and a half cup Carlini Vegetable oil. this works better for a larger cookie.
Press into a 12"-14" pizza pan and bake for 20-25 minutes until cooked in the center.
Allow to cool before frosting.
We used the marshmallow technique from the cupcakes to make the butterflies. Do do the frosting around the edges, you place the frosting into a pastry bag with frosting tips and squeeze out onto the cake. We sprinkled with the Spring Sprinkles, too.
So fun! I think it turned out really cute!
Chicken Bacon Ranch Pizza
Well. Aldi went and did it. They are now selling Pizza Crusts! YAY!!! Pre-made, easy prep, pizza crusts. Like the expensive ones you can buy in the regular grocery stores, but better and cheaper. Oh yeah. I'm a happy camper! I've had a craving for Chicken Bacon Ranch Pizza that a friend of mine introduced me to a few years ago (Thank you, Betsy!). And now, I can make it Aldified! :)
They sell regular crust and thin crust. For this recipe, I used the Thin Crust, but if you prefer a doughier crust, you may do the same with the thicker crusts, just be sure to adjust cooking times accordingly!
PS. Would have taken more pictures HOWEVER it was all gone but this one piece when I remembered to take them!!! EEEK!!!!
Chicken Bacon Ranch Pizza
1 Package Mama Cozzi's Thin Pizza Crusts
1 jar Tuscan Garden Ranch Dressing
2 Grilled Kirkwood Chicken Breasts
1 large tomatoes, diced
1 small red onion, diced
1 Package Tuscan Garden Real Bacon Bits
2-4 Cups Friendly Farms Shredded Colby Jack Cheese (this will depend on how cheesy you like it!)
Stonemill Essentials Italian Seasoning Blend
Preheat Oven to 425.
Once heated place crusts in the oven for about 5 minutes - just to prebake a LITTLE bit. This step allows for a crispier crust. Place right on the oven rack if possible. (save the sauce packets for another purpose, you will not be using them for these pizzas!)
Remove from oven. Allow to cool slightly.
Dice chicken in small pieces and put about half cup of dressing over chicken just to "moisten" it.
Squeeze 3/4 cup of dressing onto the top of each crust and spread out. Sprinkle about 3/4 cup of the cheese over top of each crust. Top with half of the ranch-moistened chicken over top. Add half of the diced tomatoe to each pizza, and half of the onion dices to each pizza. Top with another 1/2-3/4 cup cheese and sprinkle bacon bits over each pizza.
Place back on oven rack and bake about 5-7 minutes until cheese is bubbly.
Allow to cool for a minute or two before slicing.
Enjoy!!!
Spring Flower Cupcakes
It's supposed to be spring in these parts. It is not. In fact, it snowed this morning. It was also St. Patrick's Day the other day. Not in this house, because we are not Irish....however, my youngest was born on St. Patrick's Day in 2005. So, I forever have a leprechaun. Her birthday is celebrated all over the country with ham & cabbage, and green beer. Poor kid. I still remember the day the brought her back to me in the hospital. They had decorated her hospital bassinet with shamrock stickers, they had a little bottle filled with silver-wrapped Hershey's Kisses also decorated with shamrock stickers, and they'd KY-jellied a little bow onto her head. She was so cute, and pink, and leprechauny.
To celebrate her birthday this year, her older sister (and wanna-be chef) made her dinner to order. She also asked for these special cupcakes. Thanks for the inspiration, Family Fun Magazine.
Spring Flower Cupcakes
1 Box Baker's Corner Devil's Food Chocolate Cake Mix
2 Sticks Country Creamery Butter, melted
1 1/4 Cup Milk
4 Eggs
1 Tub Baker's Corner Easter Frosting in Green
1 Bag Baker's Corner Large Marshmallows (you'll only use about 15-20)
1 Bag Baker's Corner Mini Marshmallows (you'll only use a few)
1 Shaker of Baker's Corner Sprinkle in Spring Colors (for sale right now!)
DO NOT FOLLOW THE DIRECTIONS ON THE BOX FOR BAKING THE CAKE...follow these instead:
Preheat oven to 350.
Place cake mix in mixer. Add melted butter, milk and eggs. Beat on medium speed for 3 minutes until fluffy. Place in cupcake liners in a muffin pan. Bake 14-18 minutes (depends on your oven!) or until toothpick inserted into the center comes out cleanly. Allow cupcakes to cool completely!
Frost tops of cooled cupcakes with green frosting. Cut marshmallows and dip in sugars and place in petal pattern on top of cupcakes. Use the large ones for the petals, and the little ones (cut in half) in the centers. *You can get 3-4 petals out of each large marshmallow. This is a STICKY process, make sure to rinse and dry your scissors often!
ENJOY SPRING, even if your toes are freezing.
Friday, March 8, 2013
Peanut Pretzel Caramel "Crack" Bars
So, for the last few weeks I've had some random ingredients in my cabinet. I had intended to make Sand Hills Lighthouse Inn's Hot Fudge Sauce , but never had the chance.
Recently, a dear friend lost her mother, and I was making a meal for her. After making Mama F's Minestrone , I decided I needed to make a dessert. I've been dreaming of something with peanut butter, caramel, pretzels and chocolate. Like Take 5 Bars from Hersheys. Crunchy, salty, peanutty, chewy, sweet, etc. The Umami of sweet treats.
This is what I came up with, I dare you not to like them. Or eat them ALL in one sitting! Oh my!
Peanut Pretzel Caramel "Crack" Bars
Cookie Layer:
1/2 Cup Berry Hill Crunchy Peanut Butter
1/3 Cup Grandma's Best Granulated Sugar
1 Golden Hen Egg
1/3 Cup Grandma's Best Flour
1-2 Cups Clancy's Mini Pretzel Twists
Caramel Layer:
1 Package Werther's Original Chewy Caramels
1/4 Cup Friendly Farms Heavy Whipping Cream (you could also use half n' half)
Chocolate Layer:
1 bar Choceur Milk Chocolate Bar
Preheat Oven to 375.
Cream together peanut butter and sugar. Add egg and mix well. Add flour and mix until incorporated. Press cookie mixture into a well-greased (or even better, parchment lined) 8X8 pan. Press pretzels into cookie dough in an even layer. Bake for about 10-12 minutes until cookie is puffed, golden and cooked through (this will depend on your oven). Remove from oven to cool.
Melt caramels & cream together in a double boiler over medium low heat (you can also set a glass bowl over a pot of simmering water, just make sure the bowl does not touch the water). This is a slow process, but continue to heat until melted and bubbly. Stirring frequently with a spatula or other non-stick utensil. Once melted, pour over cookie layer in pan and spread evenly. Allow this to cool for a while.
In a glass bowl, break up chocolate. Melt in 30 second intervals in a microwave until melted and smooth. Pour over the cooled caramel layer. Break remaining pretzels over top and lightly press into chocolate layer.
Allow to cool completely. Then place in the refrigerator. NOTE: The chocolate layer will take a while to solidify since the caramel carries such residual heat. If you cool overnight, it will resolidify without refrigeration. I chose to refrigerate because I was impatient. :)
Remove from fridge and allow to come to room temp before cutting (this will help avoid cracking and make getting through the caramel layer easier). If you've used parchment paper, lift it out of the pan to make cutting much easier. Cut into 16 1" squares.
Eat all of them in one sitting. Just kidding. :)
Wednesday, March 6, 2013
I promised you leftovers.....
Well, yesterday, I promised leftovers from the Pot Roast, right? I'm sure you noticed there was a ton of gravy left. And if you fought the urge to drown buttered slices of bread with the gravy and eat it all, you have enough to start a soup. We had about 1 serving of meat left as well. I always prepare just a little extra for this purpose. Well, here's what I did with my leftovers. Add a loaf of crusty bread and you've got another meal. A light meal, but a meal none-the-less.
"Leftover" Beef Vegetable Soup
Leftovers of Tuesday Night Pot Roast
2 Chef's Cupboard Beef Bouillon Cubes
1 to 2 cups water * To YOUR favorite constancy
1 Cup Frozen Veggies - use what you have, we had leftover peas and corn I threw in
1/2 Cup Brown Rice, cooked noodles....whatever you have to toss in
Break up the leftover beef pot roast into a soup pot. Add water and bouillon cubes. Bring to a slow simmer. Add vegetables and rice/noodles. Simmer until vegetables are warm. Enjoy!
Tuesday, March 5, 2013
It Must be Tuesday, Dinner's in the Slow-cooker!
Tuesdays. I think I actually dislike Tuesdays more than Mondays. Tuesdays around here are CRAZY! My oldest has Science, my youngest has gymnastics, my middle has Karate. We do school in the morning and run all afternoon and evening. When I finally make it home from the craziness, I am both tired AND hungry.
Enter the slow-cooker. I truly believe this was the invention that is even better than sliced bread. A little work in the a.m., and the result is yummy, creamy, warm and cozy food in the evening. And it's even nicer on days when it's 27 degrees outside, and the weather man is predicting snow in the next 24 hours. The slow-cooker in my house gets a lot of use. Especially on Tuesdays. A couple years ago for Christmas, my mother bought me the Hamilton Beach Slow-Cooker that has one base and 3 different crock styles. It has a 2 Quart, 4 Quart and a 6 Quart. It's such a lifesaver. I love this stupid piece of kitchen equipment nearly as much as my Kitchen-Aid Mixer. Before I wax poetic about it, I'll move on.
The other invention I like a lot, Reynold's Crock Pot Liners - again, not an Aldi thing, but very cheap at Walmart and other stores....I do get them. Anything to make my Tuesdays easier.
Well, today is Tuesday. I confess that one of the ingredients in tonights dinner is NOT from Aldi. I got a beautiful Eye of Round Roast from Costco the other day, and that's whats sitting there. Aldi does very occasionally sell eye of round roast, but more frequently sells it's cousin, the Chuck Roast, which would also work in this recipe. Chuck is also a slow-cooking friendly roast, it just tends to "shred" more than an eye of round.
You will notice that there is a lack of a normal pot roast ingredient in this dish. Potatoes. Yes, I did not include potatoes. Hubby's diet demands that, however, if you choose to add potatoes, you may!
Tuesday Pot Roast
3-4 Lb Eye of Round or Chuck Roast
1 medium onion, large dice
1 stalk celery, cut thin
2 cloves garlic
4 carrots, peeled and cut in coins
1 10 oz package of Baby Bella Mushrooms, stems removed and quarter (reserve stems for the leftover dish from this recipe!)
1 can Fit & Active Cream of Mushroom Soup
1 package Chef's Cupboard Beefy Onion Soup & Dip Mix
1 Can Happy Harvest Diced Tomatoes, drained
1 Can Happy Harvest Tomato Sauce
2 Tbs Baker's Corner Corn Starch
2 bay Leaves.
Ground Black Pepper (fresh if you have a grinder)
Place ingredients in the crockpot in the following order: onion, celery, garlic, carrots, mushrooms. Trim outside fat from the roast (this is harder to do on a chuck than a eye round, so feel free to skip on the chuck unless there's a thick layer of fat on the outside). Liberally pepper the outside of the roast on all sides and place in the slow-cooker on top of the vegetables.
In a medium bowl, mix together mushroom soup, onion soup mix, drained diced tomatoes, tomato sauce and corn starch. Make sure the cornstarch is fully incorporated and not lumpy. Pour over the roast and vegetables. Tuck the two bay leaves inside the gravy.
Cook on low 8-10 hours. I find that removing the lid the last half hour or so allows the gravy to thicken nicely. Slice and serve with the gravy & vegetables. Since we don't do potatoes, we usually serve over Fit & Active Brown Rice OR Mashed Cauliflower.
Thursday, February 28, 2013
Red Velvet Cake Batter Ice Cream
Oh yea, I said it. You can believe it. Red Velvet Cake Batter Ice Cream. Oh boy, oh yum, oh yeah, I'm a happy girl!
Again, Pinterest has sparked an interest in me. I keep seeing pictures of delectable ice creams that taste like cake batter. Well, lets face it, Red Velvet is the ultimate cake batter, right? So, of course I had to try it.
This recipe is EASY. And I didn't waste the rest of the batter. I baked them into cake mix cookies that I frosted, broke up and mixed into the ice cream. Just yummy.
A little bit of work that's well worth the effort. Feel free to try with your favorite flavor of cake mix!
Red Velvet Cake Batter Ice Cream
Ice Cream:
1 Cup Friendly Farms Heavy Cream
3 Cups Friendly Farms Half & Half
3/4 Cup Grandma's Best Granulated Sugar
1 Tsp Stonemill Classics Pure Vanilla
2/3 Cup Baker's Corner Red Velvet Cake Mix
Cookies:
Remaining Baker's Corner Red Velvet Cake Mix
1 Golden Hen Egg + 1 Egg White
1/4 Cup Carlini Vegetable Oil
1/2 Cup Baker's Corner Vanilla Frosting
NOTE: MAKE THE COOKIES FIRST SO THAT THEY ARE COOLED AND READY TO PLACE IN THE ICE CREAM. :)
For Ice Cream:
Mix sugar and cream together until sugar is dissolved. Add Half & Half and vanilla and mix well. Sift in cake mix while whisking untit very smooth - work to have no lumps. Yes, this will be pink. Pour mixture into an electric ice cream freezer and process for about 25-30 minutes until frozen. Stir in cookie pieces in the last 5 minutes.
Transfer ice cream to a plastic container and freeze for about an hour or two until firm (or serve as soft serve out of the ice cream maker if preferred).
For Cookies:
Mix together remaining Cake mix, egg, egg white and vegetable oil to create a thick batter. Shape into 1" balls and roll in granulated sugar. Bake at 375 for 6-8 minutes. Allow to cool on baking pan for 10 minutes, then allow to cool before frosting. To frost, I melted frosting and poured on top of cookies. Once cooled and set, you can cut up the cookies into chunks to stir into the ice cream.
This recipe will make about 2 dozen cookies. I recommend not adding more than 5 or 6 to the ice cream, though. Save the extras to serve with the ice cream. :)
Enjoy.
Crock Pot Chicken Teriyaki
Since it was Chinese New Year a couple weeks ago, Aldi's shelves are filled with Fusia Chinese products. This is one of my favorite times of year there, and I stock up, let me tell you. A new addition to the Fusia line this year was a Teriyaki sauce! Mmmmmmmmm....
This recipe is a mesh of a few I found around the internet, and several that were "pinned" on Pinterest. Of course, as normal, I adjusted to fit OUR tastes. :)
I'm sorry there's no picture. I made this for my family on a night when I had to go out to a meeting, so I didn't get to eat it until very late. They were all so hungry they forgot to take a shot of it! Everyone enjoyed it immensely. Leftovers did not last long! Thankfully, I did get to try it before it was all gone! it were yummy.
Crock Pot Chicken Teriyaki
1 1/2 - 2 Lbs Kirkwood Boneless Skinless Chicken Breast, cut in cubes or thin strips
1 small onion, large dice
1 green pepper, seeded and large dice
1/2 Cup Fusia Teriyaki Sauce
1 Cup Fit & Active Chicken Broth
1/3 Cup Baker's Corner Brown Sugar
3 Cloves Garlic, minced
2 Tbs Baker's Corner Corn Starch
Place vegetables and chicken into a crock-pot. In a separate bowl, mix together Teriyaki sauce, chicken broth, brown sugar, garlic and corn starch. Pour this mixture over chicken and mix in. Cook on low 3 hours* (this will depend on your crockpot).
Serve over rice, with chopsticks, and enjoy! You just saved money on take out! On a recipe that took you less time than ordering it!!!
*a lot of times a short term slow-cooker recipe for us is perfect because I have to be out of the house for a good part of the afternoon. This helps us have dinner, but doesn't need to be done at o'dark thirty in the morning before I've had caffeine.
This recipe is a mesh of a few I found around the internet, and several that were "pinned" on Pinterest. Of course, as normal, I adjusted to fit OUR tastes. :)
I'm sorry there's no picture. I made this for my family on a night when I had to go out to a meeting, so I didn't get to eat it until very late. They were all so hungry they forgot to take a shot of it! Everyone enjoyed it immensely. Leftovers did not last long! Thankfully, I did get to try it before it was all gone! it were yummy.
Crock Pot Chicken Teriyaki
1 1/2 - 2 Lbs Kirkwood Boneless Skinless Chicken Breast, cut in cubes or thin strips
1 small onion, large dice
1 green pepper, seeded and large dice
1/2 Cup Fusia Teriyaki Sauce
1 Cup Fit & Active Chicken Broth
1/3 Cup Baker's Corner Brown Sugar
3 Cloves Garlic, minced
2 Tbs Baker's Corner Corn Starch
Place vegetables and chicken into a crock-pot. In a separate bowl, mix together Teriyaki sauce, chicken broth, brown sugar, garlic and corn starch. Pour this mixture over chicken and mix in. Cook on low 3 hours* (this will depend on your crockpot).
Serve over rice, with chopsticks, and enjoy! You just saved money on take out! On a recipe that took you less time than ordering it!!!
*a lot of times a short term slow-cooker recipe for us is perfect because I have to be out of the house for a good part of the afternoon. This helps us have dinner, but doesn't need to be done at o'dark thirty in the morning before I've had caffeine.
Subscribe to:
Posts (Atom)